The Fifth Trooper – Legion 101 – Learning to Count in Star Wars: Legion

Star Wars Legion Counting

Learning to Count In Star Wars: Legion

One of the largest goals of Legion 101 is to help new players understand the fundamentals of “good Legion play.” I put “good” in quotations here because it’s a catch-all term for a set of ideas about how the play the game that, random factors willing, produce a positive result.

The number one way to begin to improve is becoming more deliberate about the way the game is played. These articles are written in the hopes of taking some portion of one’s Star Wars: Legion play off autopilot. How many times have certain game states caught me unaware, and victory slipped from my grasp?

So, that said, what does the title phrase “learning to count” actually mean? There are multiple parts of the game where pausing for a moment to gather some data about the board state will help you make better decisions. That’s a complicated way of saying that counting up certain aspects of the board will make you more aware of your win condition, and can guide you towards the next best move.

The Imperial Shoretroopers Unit Expansion is Available Now

Selected for rotational duty from exceptional Stormtrooper squads, Imperial Shoretroopers are trained not only in tropical environment operations, but also in entrenched warfare. Often assigned to important bases such as the Imperial security facility on Scarif, Shoretroopers use their expertise and equipment to counter Rebel ambushes and ensure Imperial secrets remain safe. 

Within the Imperial Shoretroopers Unit Expansion, you’ll find seven unique, unpainted Imperial Shoretrooper miniatures to add to your Star Wars™: Legion collection. Five of these troopers are armed with E-22 blaster rifles while a Shoretrooper equipped with a T-21B targeting rifle is ready to deal extra damage from long range. But if you’re truly looking to keep enemy units from escaping with sensitive information, a DF-90 Mortar Trooper can be added to your army as a detachment from the rest of your Shoretroopers. Rounding out this expansion are two unit cards, five upgrade cards to fully kit out your Shoretroopers, and all the tokens you need to deploy them to any battle.

Pick up your copy of The Imperial Shoretroopers Unit Expansion (SWL41) at your local retailer today or online through our website here!

FFG: Tutorial for Adding LED Lightsabers to Your Star Wars: Legion Miniatures

“Not as clumsy or random as a blaster; an elegant weapon for a more civilized age.”
   —Obi-Wan Kenobi, Star Wars: A New Hope

Not only does Star Wars™: Legion invite you to build a unique army of iconic troops, vehicles, and characters from across the Star Wars saga, it also gives you the opportunity to put your own personal touch on that army by painting and customizing your miniatures. For some, like Matthias Gruettke, this involves modifying the miniatures themselves, including the weapons they carry into battle.

Lightsabers are some of the most recognizable weapons in the entire Star Wars galaxy, wielded by noble Jedi and ambitious Sith lords alike. Rather than paint the lightsabers on his miniatures, Gruettke carefully replaces their blades with LEDs that reflect the soft glow of an ignited lightsaber. Join him today as he breaks down the process of bringing these iconic weapons to life in Star Wars: Legion!       

A Jedi’s Weapon

When I saw the first pictures of Star Wars: Legion miniatures, I immediately thought how hard it would be to paint the blade of the lightsaber. I mean, it’s made of pure energy. How do you paint pure energy? There are some really talented painters who can do this for sure. But this illusion works mostly in dioramas where you look at the miniature from a certain angle. On the battlefield this is a totally different matter, because you and your opponent look at the miniatures from serveral perspectives.

That’s why I have come up with another solution. Why not use light to power the blade of the most iconical weapon in the Star Wars galaxy?

In this article, I will show you how to use LEDs and acrylic rods to light up your Force users’ weapons. It won’t be the easiest work, but with some patience you will make it!

What You Need

Materials:

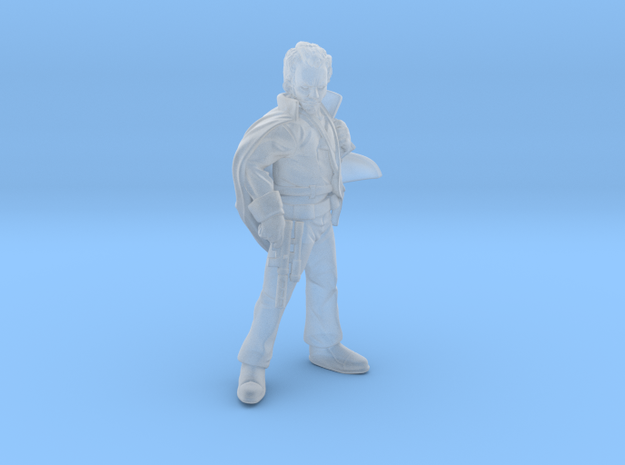
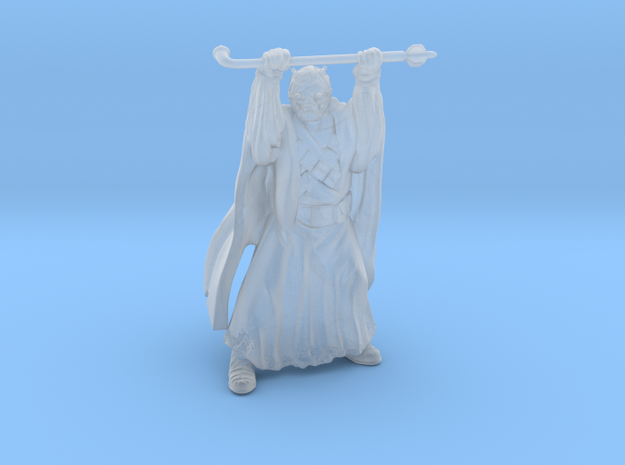
  • Star Wars: Legion Luke Skywalker, Darth Vader, Obi-Wan Kenobi, or General Grievous miniature
  • Star Wars: Legion base
  • Silver conductive paint
  • Super glue
  • 1x transparent acrylic rod in the color you are heading for the blade
  • 1x pre wired 0402 SMD LED in the color you are heading for the blade
  • 1x 56 ohm resistor (not needed if you use a blue or white LED)
  • 1x Neodymium sphere magnet Ø 3mm
  • 1x Neodymium block magnet 5 x 1.5 x 1mm
  • 1x Button cell battery CR2016 or CR2032

Tools:

  • Hand drill
  • Drill bits (Ø 0.5mm / 1.0mm /1.5mm / 3.0mm)
  • Hobby knife

1x Sheet fine sandpaper

Let’s Get Started

Use the 3.0mm drill bit to drill a hole in the middle of the Legion base using the hand drill. Be careful not to drill in your hand or any surface you won’t like to have holes inside. The hole doesn’t have to be placed exactly in the middle, just somewhere around the center of the base.

Clean the drill hole edges with the hobby knife so no plastic is sticking out from the surface or the backside of the base.

Drill another hole near the outer edge of the base with the 1.5mm drill bit.

Now, put the 3mm neodymium sphere magnet in the hole in the middle and the 5 x 1.5 x 1mm neodymium block magnet in the smaller hole at the edge of the base. Ideally, the holes are so small that the magnets barely fit into them. If they are the proper size, you shouldn’t have to use super glue to hold the magnets in place. If the holes are too big and the magnets won’t hold up by themselves, use only a really tiny drop of super glue to hold them in place. It is absolutely important that the areas sticking out of the upper side of the base as well as the areas that aim towards the inside of the base are not covered with glue, because you need the bare metal surface of the magnets as contacts for the battery and the conductive paint.

If you use a red or green LED, you’ll have to install a resistor, otherwise you risk burning your LED! To do so, expand the the smaller edge hole with the 0.5mm drill bit carefully and stick one end of the 56 ohm resistor into it. The wire piece of the resistor should be as close as possible to the magnet. Glue the resistor body part onto the base and cut the ends of the resistor wires with the hobby knife. The base should now look like this:

Painting wires

In the next step, glue the miniature on the base. The right foot should be placed next to the open wire end of the resistor. Now, use the silver conductive paint and apply it to the contacts between the magnet on the edge of the base and the resistor. Then, draw a line from the end of the resistor to the right foot of the miniature and up to the right leg. If you are working on Luke Skywalker, paint a wire up to the right arm hole. If you’re working on Darth Vader, on the other hand, go up from the resistor end to the foot to the inner cloak to the underside of his belt.

Repeat the process on the other foot. This time, paint a wire line from the magnet in the middle of the base to the left foot and leg and then to the left arm hole on Luke Skywalker or above the belt for Darth Vader. WARNING: Do not cross the wires! The LED won’t work if the two painted wire lines contact one another before they reach the LED contacts! So don’t be hasty. Be one with the Force and paint the wires carefully. If you cross the wires, use the hobby knife to scratch a bit of paint off and separate the wires again.

Insert the Kyber Crystal

Now we come to the interesting part—installing the LED. Cut the blade from the hilt of the lightsaber of your miniature, but don’t throw the blade away yet. Use the 0.5mm drill bit to drill a pilot hole inside the hilt. Be sure that the hole sits exactly in the middle of the hilt. Drill about 2-3mm deep inside the hilt. Then progressively widen the hole with the 1mm and then the 1.5mm drill bits. Dry fit the arcylic rod inside the hole. If the rods fits, you can go to the next step.

Change to the 0.5mm drill bit again and drill another hole on the backside of the hilt where the palm touches it. Try to drill towards the existing hilt hole to get a connection. After you break through, insert the pre-wired LED from above and shove the wire throught the hilt. Use the super glue to tack the red and black wires to the inner underside of the arm(s). Pay attention not to glue your fingers together or to the part of the miniature.

On Luke, lead the black wire along his left arm and the red one along his right arm. Wrap the wire ends around the pins that are used to connect the arms with Luke’s body. Cut the wire and use the hobby knife to scratch off the red and black isolation layer of the cable until you see the metal of the wire. Try to scratch this layer off the wires that are wrapped around the pins.

On Vader you can already glue the arm to his body.

Ignite the saber

Apply a bit of the conductive paint on the pins of Luke’s arms and let it dry for about 5 minutes. Then apply super glue on the edges of the arm holes on the miniature’s body. Don’t use much super glue, the holes should not be filled up with it! Then stick the arms on Lukes body. After the super glue has dried apply some more conductive paint around and inside the pits of the cut.

If you are doing Vader, just tack the black wire to the silver painted seam above the belt and the red one to the painted seam below the belt. Cut the wire and use the hobby knife to scratch off the red and black isolation layer from the cable until you see the metal of the wire. Do this on each wire until you have scratched off about 5mm of isolation. Then, use the silver conductive paint and go over the unisolated cable again. Be sure to paint over all of the super glue to get a nice connection.

Now, use the blade you cutt off the saber to measure the lenght of the acrylic rod you need. Add 2-3mm to the total length (that will go inside the hilt) and cut the acrylic rod. If you have some fine sandpaper available, use it to sand the upper cutting edge of your blade. You can use the hobby knife for this as well, but sandpaper would be better.

Now, stick the rod inside the hole in the hilt and apply the button cell battery. The ‘rough’ side of the cell battery (minus pole) must adhere to magnet in the middle of the base. If the blade lights up, well done! You are a true master of the Force!

Some Final Hints

  • Don’t glue the acrylic saber blade to the miniature until your are done painting!
  • If you use an airbrush or a spray primer to prime your miniature, be sure to stick some adhesive tape on the hilt so that no paint will cover the LED.
  • If the LED won’t work at the end don’t worry. Check all connections between magnets, resistor, miniature, and LED wire. There should be a closed current circuit to light the LED. You can use another LED (if the button cell is applied to the miniature) or a multimeter and check point by point if the circuit is interrupted somewhere. If you find the disruptive area close the circuit with some (more) conductive paint

Big Star Wars News at D23

Hello there, indeed. A crowd erupted in cheers and leaped to give Ewan McGregor a standing ovation as he surprised fans at D23 Expo Friday evening, taking the stage to announce his reprisal of Obi-Wan Kenobi in a future Disney+ series.

The welcome return of Anakin Skywalker’s former Jedi Master was just one of many exciting moments during the Disney+ Showcase, which brought together stars from Star Wars, Pixar, Marvel, Disney, and more to kickoff the debut of the streaming service on November 12.

Here are 8 of the biggest moments and reveals during Lucasfilm’s star-studded presentation.

Star Wars

@starwars

Hello there! Just announced at : Ewan McGregor will reprise his role as Obi-Wan Kenobi in a new original series, coming to .

View image on Twitter
13.5K people are talking about this

1. Obi-Wan Kenobi is back.

Now there’s a name we’ve not heard in a long time. “After secrets and fibs and not being able to talk about it, I am thrilled to bring out a beloved member of the Star Wars fandom,” Lucasfilm president Kathleen Kennedy told the crowd to herald McGregor’s arrival onstage. “Can you please ask me, am I going to play Obi-Wan Kenobi again?” McGregor pleaded. He’s been dodging questions about returning to the role for the last four years. “But now I can say yes we’re going to do it.” Scripts for the as-yet untitled Kenobi series — set eight years after the events of Star Wars: Revenge of the Sith— have been written, and Kennedy said the crew is ready to start shooting next year.

A still from The Mandalorian trailer.

2. The Mandalorian debuted its first trailer.

After an earlier announcement that Ming-Na Wen will join the cast of The Mandalorian, the show’s executive producer, writer, and newly minted Disney Legend Jon Favreau and his trusted collaborator Dave Filoni took the stage to share a first look at the action-packed world of the mysterious blaster-slinger, which you can now watch for yourself. “It’s a dangerous world,” Favreau said. From the pounding rhythm of the soundtrack to the gorgeous special effects, November 12 can’t come soon enough.

A still from The Mandalorian trailer.

3. Jon Favreau concept for The Mandalorian.

Favreau revealed his original pitch to Kennedy, “a version of a show that took place after Return of the Jedi, after the revolution, after everybody’s done celebrating because the Empire is gone,” he said. “And then chaos reigns because there’s no central government in the galaxy and so it degrades into a world where, like the old Samurai movies and the old Westerns, where the gunfighters are roaming and people are fighting for their own safety.” The beauty of creating the first live-action Star Wars series in this uncharted era with all-new characters is that it’s as accessible to new fans as it is recognizable to existing ones, Favreau said. “If you’re new to Star Wars, it’s a whole new storyline starting in a whole new timeframe that hasn’t been covered yet,” he added. “But if you are a Star Wars fan, we got you.”

A still from The Mandalorian trailer.

4. The cast is genuinely thrilled to be part of the family.

The creators were also joined by five cast members. Pedro Pascal, the titular warrior, Gina Carano, Carl Weathers, Giancarlo Esposito, and Taika Waititi, who will voice the droid IG-11, joined Filoni and Favreau to talk about becoming a part of the Star Wars. “It’s a dream come true,” Pascal said simply, a sentiment shared by many of his colleagues. “Once a part of the Star Wars family, always a part of the Star Wars family,” Weathers added.

5. The actors behind Cassian Andor and K-2SO were also reunited.

Ever since we learned that Alan Tudyk was joining the series that will bring Diego Luna back to the role of Cassian Andor, we’ve been waiting to see the two friends together again. On Friday, fans got a glimpse at the camaraderie between the two actors behind the scenes of the prequel. “It’s been hard three years,” Luna said, since his character met his end in Rogue One: A Star Wars Story. “My kids won’t look me in the eye.”

6. But there’s no name for the series. At least not just yet.

Luna and Tudyk weren’t able to reveal the name of their project, but Tudyk helpfully suggested his own title for the series set to start shooting in London next year. “Kay-Too Fast, Kay-Too Furious: A Cassian Andor Story,” he quipped delightedly.

Ahsoka Tano and Darth Maul in an image from Star Wars: The Clone Wars shown at D23 Expo 2019

7. Star Wars: The Clone Wars has been saved, and it’s heading to Disney+ early next year.

Fans of the beloved animated series following the adventures of Anakin Skywalker and his Padawan Ahsoka Tano got a glimpse at an all-new image of the fierce Togruta, taking a fighting stance against a familiar looking Dathomirian. Kennedy also announced that new episodes will debut on the streaming service in February 2020.

8. And it’s bringing along some good company.

Within the first year, Kennedy promised that Disney+ would also be the hub for the entire Star Wars galaxy, including the forthcoming Star Wars: The Rise of Skywalker. “This service will be home to the entire Star Wars collection,” she said. “Over 40 years of Star Wars storytelling in one place. I would say that’s pretty fantastic.”

The Mandalorian debuts November 12 on Disney+.

Associate Editor Kristin Baver is a writer and all-around sci-fi nerd who always has just one more question in an inexhaustible list of curiosities. Sometimes she blurts out “It’s a trap!” even when it’s not. Do you know a fan who’s most impressive? Hop on Twitter and tell @KristinBaver all about them.

Skull Forge Studios August Releases and Big News

Jordan of Skull Forge Announced today that come September you’ll be able to buy his awesome minis directly from him at a reduced cost from what Shapeways charges. He’s also helping Imperial Terrain with their Kickstarter.

Here’s what he has to offer this month:

Continue reading →

Preview the Dewback Rider Unit Expansion for Star Wars: Legion

“Only Imperial Stormtroopers are so precise.”
   —Obi-Wan Kenobi, Star Wars: A New Hope

Massive war machines such as the AT-ST and the TX-225 Occupier Combat Assault Tank do more than crush any resistance to total Imperial domination. They also project the Empire’s might across the planets they are stationed, quelling any resistance before it begins. The Empire takes a similar approach when acquiring local wildlife to support its operations throughout the galaxy.

When these operations take them to desert planets like Tatooine, mighty creatures like Dewbacks make excellent mounts for Imperial Sandtroopers, their imposing frames proving both intimidating to opposing forces and resiliant to blaster fire. Soon, you’ll be able to use these beasts to spread Imperial might across the battlefield with the Dewback Rider Unit Expansion for Star Wars™: Legion

This expansion brings another option for the support units that back up the bulk of your Imperial armies. Within it, you’ll find an unpainted and beautifully-detailed Dewback miniature with a Sandtrooper rider who can be assembled with four different weapon options: the standard shock prod, a T-21 blaster rifle, a RT-97C blaster rifle, or a CR-24 Flame Rifle. These weapons and their associated upgrade cards each give the Dewback Rider unique new ways to attack while three additional upgrade cards invite you to modify your Dewback Rider with more training and comms systems. 

Join us today as we take a closer look at the Dewback Rider Unit Expansion!

Adapted for Battle

Life on the brutally hot planet of Tatooine has made Dewbacks an extremely rugged species of reptiles able to survive at the most extreme temperatures. Fortunately for the Empire, these environmental adaptations also make them particularly useful in battle. Whether its patrolling a planet or charging headlong into a skirmish, Imperial commanders can use these hearty beasts in a number of ways.

No matter their purpose, Dewback and rider must work together to acheive maximum effectiveness in combat. For instance, while a Dewback’s claws can help them cross the difficult terrain of Tatooine with ease, it can only truly use this ability when it is spurred forward by its rider. Doing so helps these normally lumbering creatures cover a substantial amount of ground with surprising speed, allowing them to become a major part of any engagement. While these short bursts of speed may spook an untrained Dewback, the best display an uncanny Endurance  that lets them push forward without adverse effects.

Once they do enter battle, both Dewback and rider can again come together to unleash a powerful attack. Combining the Dewback’s razor-sharp claws with the Sandtrooper’s shock prod creates a unique attack that is both deadly and sends panic running through the targeted unit. Such an attack requires engaging an enemy unit up close, of course, but luckily the Dewback’s thick and scaly hide create a natural layer of protective armor against incoming attacks.

Before a Dewback can unleash one of these powerful melee attacks, though, it first needs to engage with an enemy unit, which can be quite difficult for these lumbering lizards. With its rider carefully guiding its movements, the Dewback can reposition before or after moving, putting itself in position to march directly at an enemy unit. Better yet, the rider relentlessly drives the beast forward, allowing them to immediately perform an attack after moving. 


As powerful as its melee attack may be, it is only the most basic option available to a Dewback Rider. You can just as easily outfit the Sandtrooper with three other weapons that make them effective in a variety of situations. If you’d like a highly mobile trooper who can pick off targets from a distance, a RT-97C Blaster Rifle  extends the Sandtroopers range, making the unit effective both up close and from a distance. Those who want a better chance of hitting their targets regardless of cover or armor, on the other hand, can make use of a  T-21 Blaster Rifle  for the maximum amount of fire. Alternatively, your Dewback Rider can clear swathes of the battlefield with a  CR-24 Flame Rifle,  paving the way for the rest of your troops. 

Whether attacking from afar or bullying opposing units with their sizeable bulk, a Dewback Rider can support Imperial ground operations in a variety of ways, making them invaluable tools to any Imperial commander.

Show Your Might

Towering above all but the largest units, a Dewback is an initimidating symbol of the Empire’s strength. With one in your army, you can remind your enemies of this strengthe every time it takes the battlefield. 

Look for the Dewback Rider Unit Expansion (SWL42) and the Imperial Shoretroopers Unit Expansion (SWL41) at your local retailer in the third of 2019. Pre-order your copies at your local retailer or online through our website—with free shipping in the continental United States—here!